
Dreaming of growing your own vegetables, herbs, or flowers but don’t have ideal soil or space? A raised bed garden is the perfect solution. It’s beginner-friendly, looks beautiful, and makes gardening easier on your back. Whether you’re working with a small backyard or a patio, you can create a thriving garden that feels both functional and charming.

Why Choose a Raised Bed Garden?
Raised beds let you take control of your soil and growing environment. Instead of battling poor ground conditions or weeds, you can:
- Improve drainage for healthier roots.
- Add nutrient-rich soil tailored to your plants.
- Reduce weeds and pests naturally.
- Grow more in less space, especially for small yards.
Plus, raised beds look neat and organized—like your own mini farm right at home.
Step 1: Choose the Perfect Location
Start by picking a sunny spot. Most vegetables need at least 6–8 hours of sunlight daily. Avoid low-lying areas where water tends to pool, since standing water can rot roots.
Think about convenience too—choose a location near your water source so you can easily keep the soil moist.
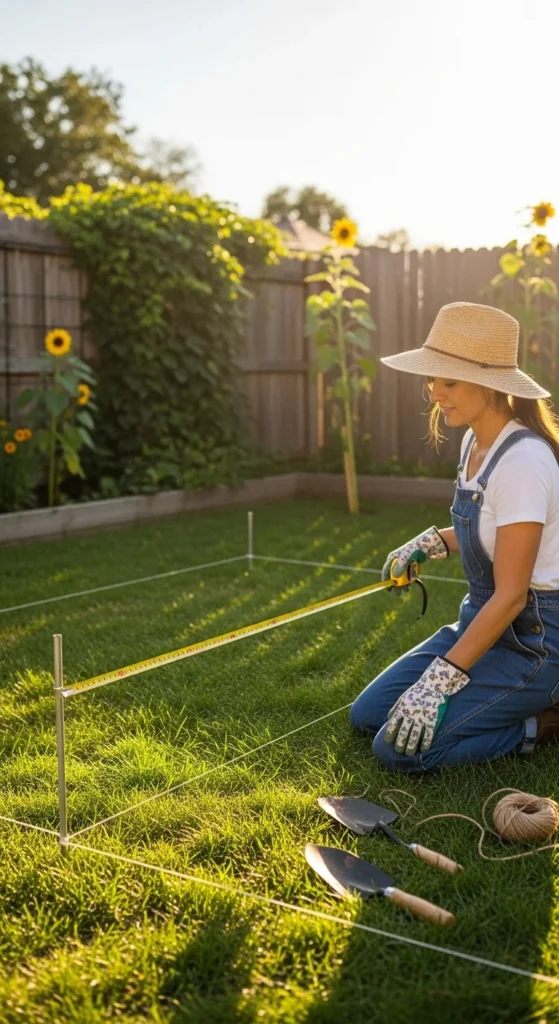
Step 2: Decide on Size and Shape
For beginners, a good starting point is a 4×8-foot bed, about 12–18 inches deep. This size allows you to reach the center from both sides without stepping into the soil (which can compact it).
You can use different shapes—rectangular, square, or even tiered—depending on your space. Just make sure it’s manageable and accessible.
Pro Tip: Leave at least 2 feet of space between beds for walking and maintenance.
Step 3: Choose the Right Materials
Building a raised bed doesn’t have to be expensive. You can use:
- Untreated wood like cedar or redwood (naturally rot-resistant).
- Recycled bricks or stones for a rustic look.
- Metal troughs or galvanized planters for a modern touch.
Avoid treated lumber—it can leach chemicals into the soil. Once you decide on your material, grab some basic tools: a saw, drill, screws, and a level.
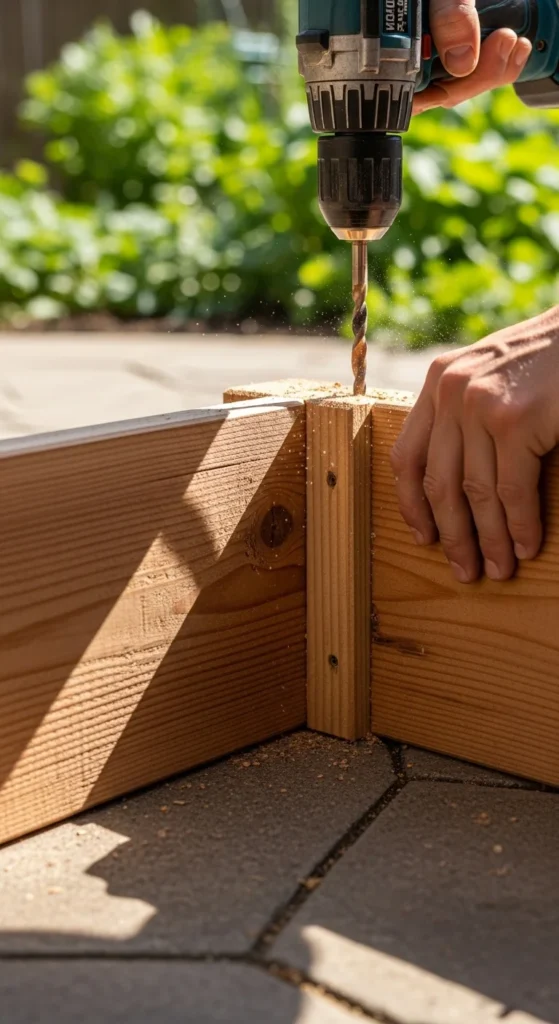
Step 4: Build the Frame
Now it’s time to assemble your bed! Here’s a quick breakdown:
- Cut the boards to your chosen length.
- Screw or nail them together to form a sturdy rectangle.
- Level the ground where the bed will sit.
- Place the frame in position and check for stability.
You can also add corner brackets for extra strength, especially if your soil will be deep or heavy.
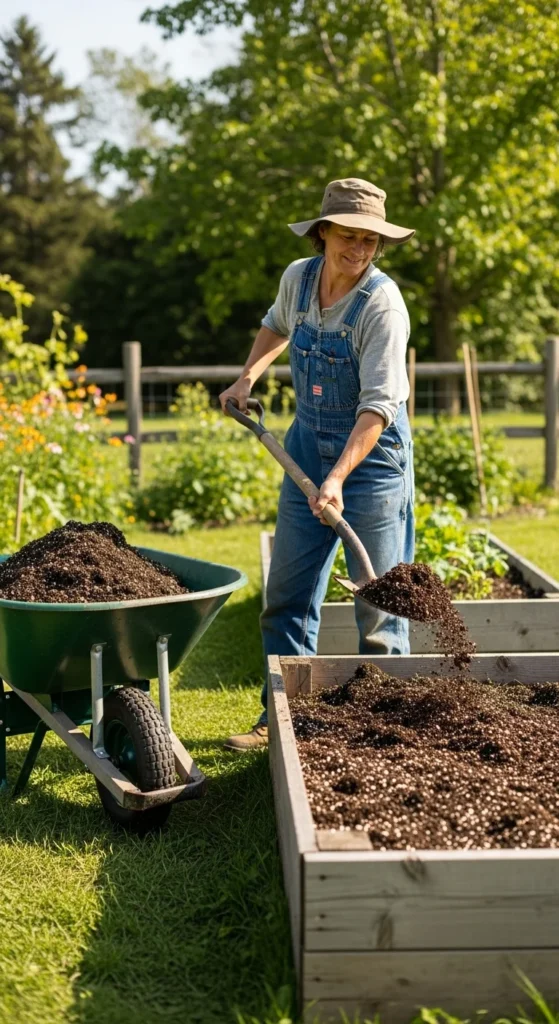
Step 5: Fill with the Right Soil Mix
This step makes all the difference! The best raised bed mix includes:
- 50% topsoil
- 30% compost (for nutrients)
- 20% coarse sand or perlite (for drainage)
Mix them well before filling the bed. This combination creates loose, rich soil that encourages strong root growth and abundant harvests.
Optional: Add a layer of cardboard or landscape fabric at the bottom to block weeds.
Step 6: Plan and Plant Smartly
Before planting, sketch a quick layout. Group plants by their sunlight and water needs. Some beginner-friendly plants include:
- Leafy greens: lettuce, spinach, kale
- Root veggies: carrots, radishes, beets
- Herbs: basil, parsley, mint
- Flowers: marigolds and nasturtiums (great pest repellents)
Plant taller crops on the north side so they don’t shade smaller plants.
Water thoroughly after planting, and add a 2-inch layer of mulch to keep moisture in and weeds out.
[Image Prompt] A close-up of a raised bed garden with a mix of lettuce, basil, tomatoes, and marigolds thriving under the sun.
Step 7: Maintain and Enjoy
Once your garden is planted, maintenance is simple:
- Water regularly, especially during hot spells.
- Add compost every few weeks to replenish nutrients.
- Pull weeds early before they spread.
- Rotate crops each season to prevent soil depletion.
Keep an eye out for pests—hand-pick them or use natural deterrents like neem oil or garlic spray.
Bonus Tip: Extend the Season
Want to grow longer into the fall or start early in spring? Add a simple hoop cover using PVC pipes and garden fabric. It traps warmth and protects plants from frost, giving you extra weeks of fresh produce.
[Image Prompt] A raised garden bed covered with a simple PVC hoop and transparent garden fabric to protect plants from cold weather.
Final Takeaway
Building a raised bed garden is easier than it looks—and once it’s done, you’ll enjoy fresh, homegrown food for years to come. It’s an investment in both your garden and your well-being.
So grab your tools, pick your spot, and start building your little green haven today!
Save this guide for later so you can refer back when it’s time to start planting!

Leave a Reply