
Winter gardens often look unfinished once plants die back. Edging solves that problem fast. Clean borders keep beds defined, control spreading soil, and give your outdoor space a polished look even in cold months. The right edging works quietly in the background. It frames paths, highlights structure, and keeps winter landscapes calm and tidy. These ideas focus on affordable materials, simple installs, and styles that still look intentional when flowers are gone.
1. Natural Stone Slab Borders

Natural stone slabs bring instant structure to winter beds. Their weight keeps edges in place during freeze and thaw cycles. Lay stones flush with the soil to create a clean line that stays visible even when plants fade.
You do not need custom stone. Broken patio slabs or local stone pieces work well. Set them on compacted soil or sand for stability. Keep spacing tight for a refined look.
Stone adds contrast against dark winter soil. It also pairs well with evergreen shrubs and dormant grasses. For small gardens, use stones only along key areas like entry paths.
Budget tip: Ask landscape suppliers for leftover or irregular stone pieces. These often cost less and still look intentional when laid evenly.
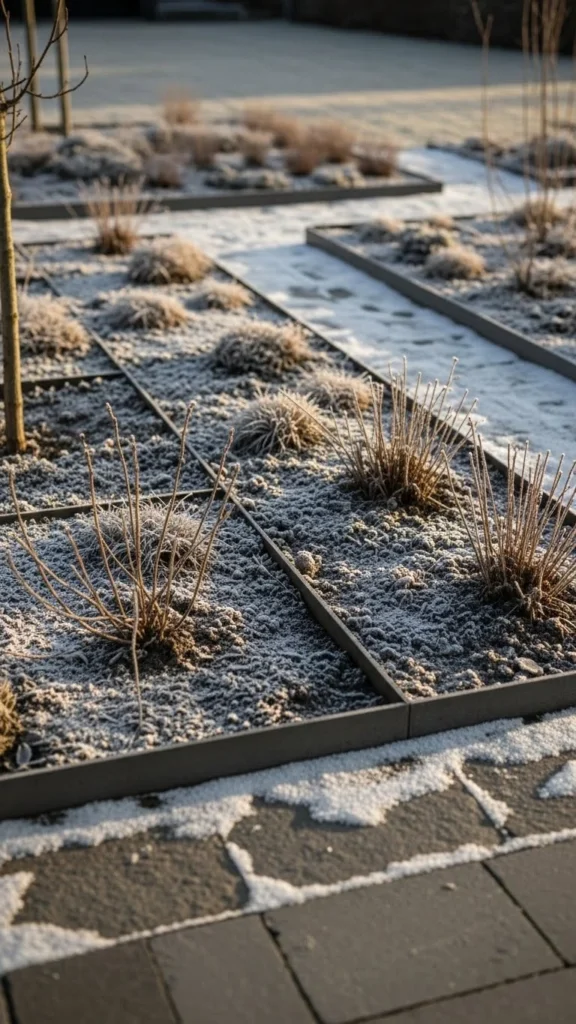
2. Steel Flat Bar Edging
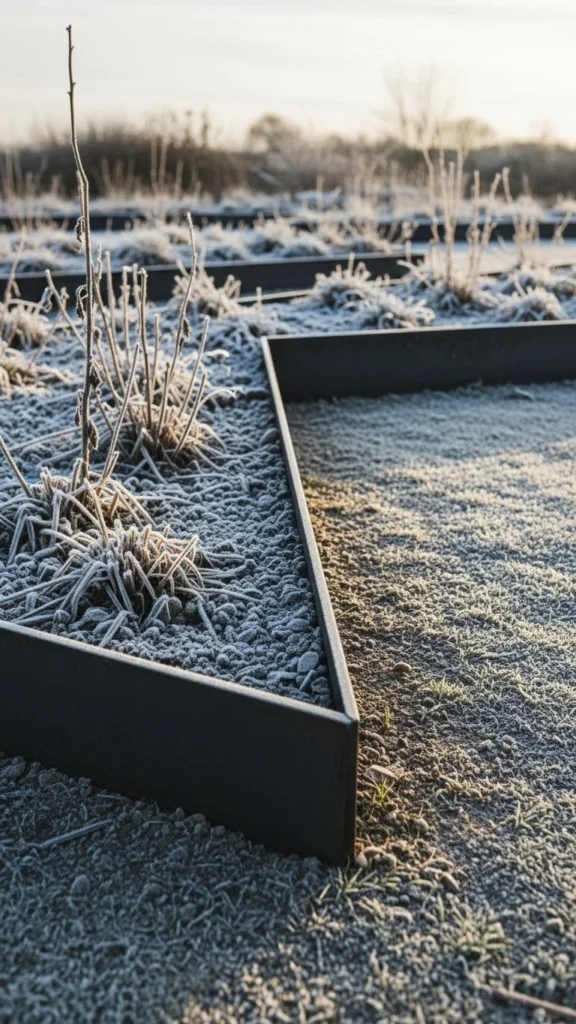
Steel flat bars give beds sharp definition without visual clutter. The low profile keeps focus on garden shapes rather than materials. Steel handles cold weather well and stays straight through winter.
Installation stays simple. Dig a narrow trench and tap bars into place. Leave just enough height visible to separate soil from paths.
Steel works well in modern or minimalist gardens. It pairs nicely with gravel, concrete, and stone walkways.
Budget tip: Look for untreated steel strips from metal suppliers. Surface rust adds character and helps the metal blend into winter landscapes.
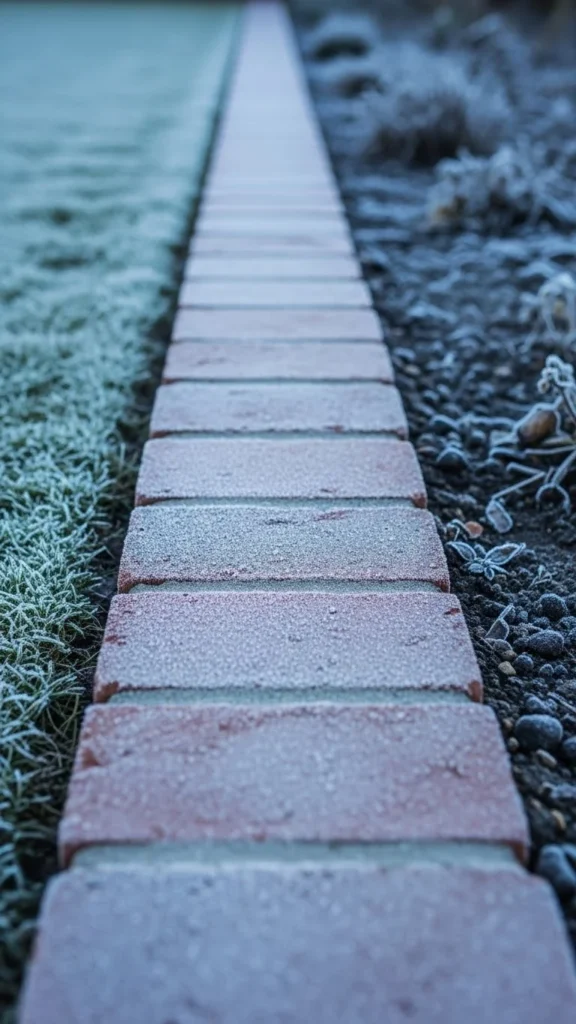
3. Brick Soldier Course Edging

Vertical bricks create a structured edge that still feels classic. The upright layout holds soil in place during winter rains. It also stays visible when snow lightly covers beds.
Use reclaimed bricks for charm and savings. Set them close together in compacted sand or soil. Keep tops level for a tidy line.
Brick edging suits cottage and traditional gardens. It pairs well with evergreen hedges and winter containers.
Budget tip: Check demolition sites or salvage yards for bricks sold by the pallet at lower cost.
4. Gravel Trench Borders
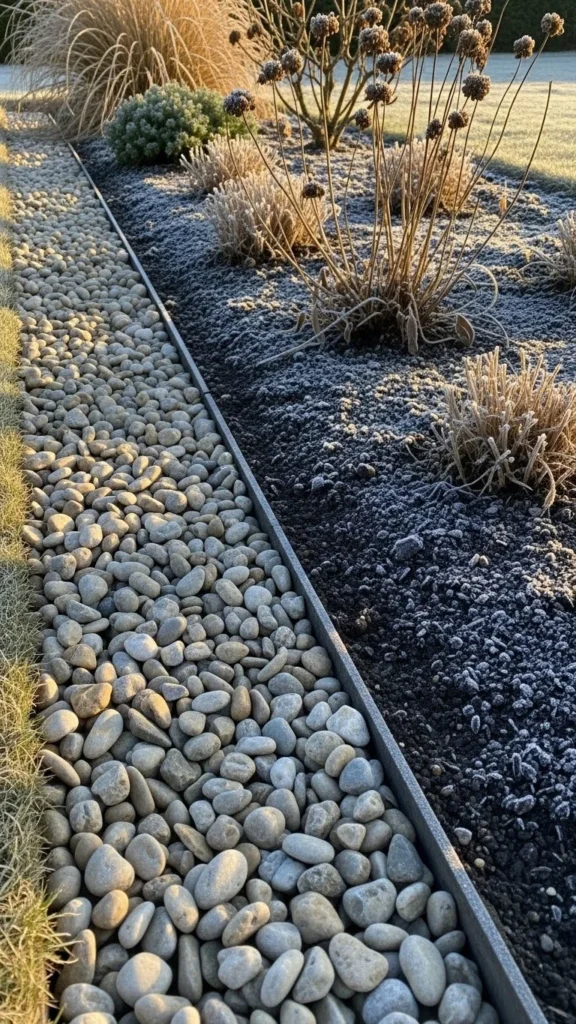
A gravel trench creates separation without solid materials. Dig a shallow channel and fill it with crushed stone or pea gravel. The contrast stays visible even in winter.
Gravel drains well, preventing muddy edges during wet months. It also helps control weeds along borders.
This style fits informal gardens and works well around shrubs and trees.
Budget tip: Use leftover gravel from other projects. Mixing stone sizes adds texture without extra cost.
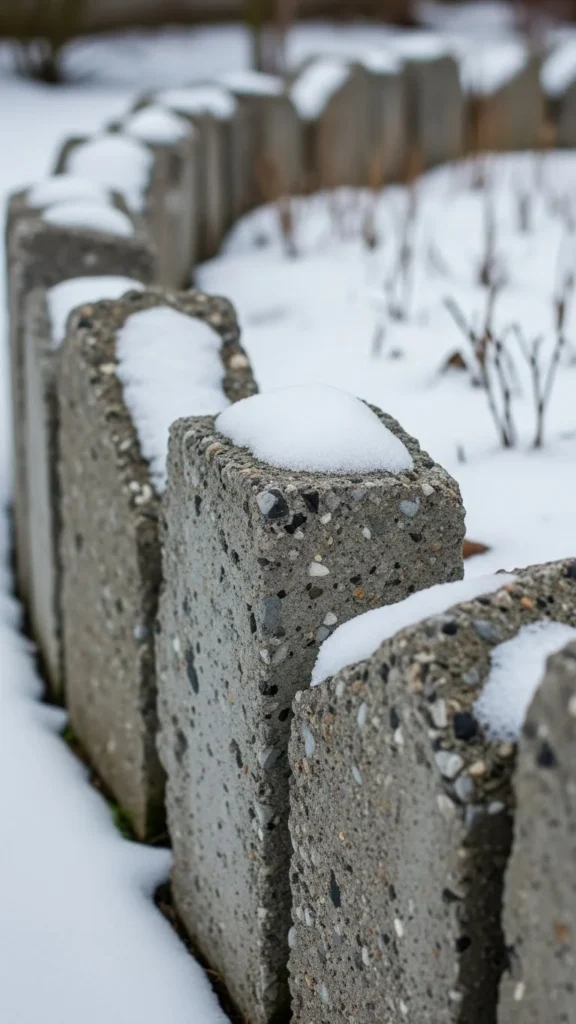
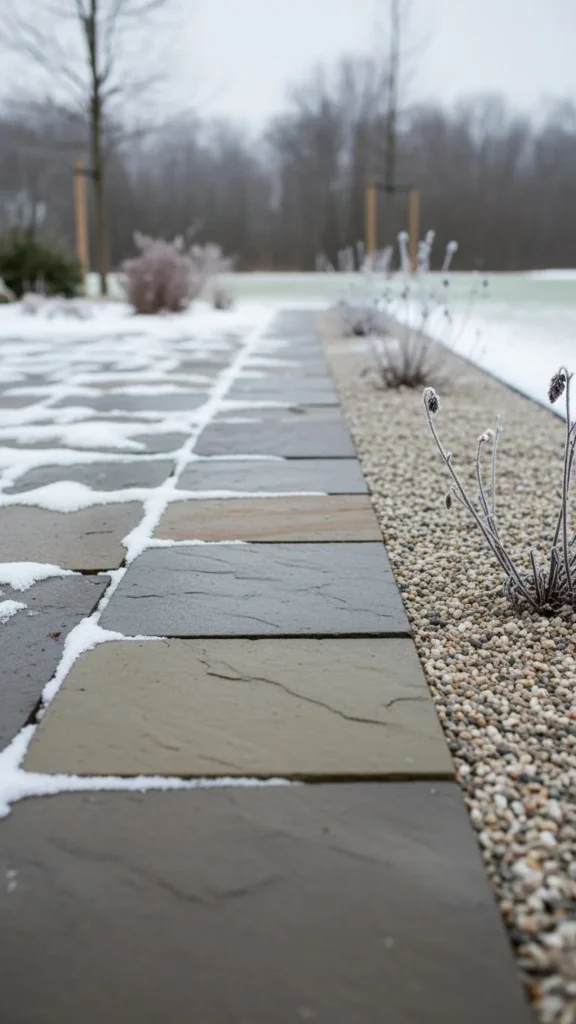
5. Concrete Paver Edging
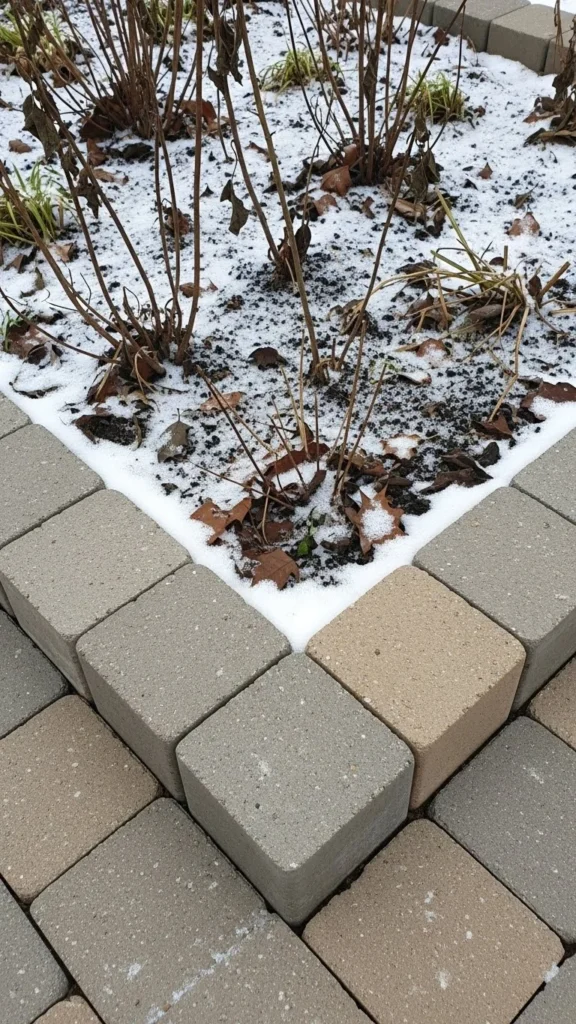
Concrete pavers create a strong visual frame. Their uniform shape keeps lines crisp when plants disappear.
Lay pavers flat or upright depending on desired height. Keep spacing tight for a seamless look.
Concrete suits modern and transitional gardens. It pairs well with structured paths and raised beds.
Budget tip: Choose basic gray pavers instead of decorative styles. Clean lines do the work without extra detail.
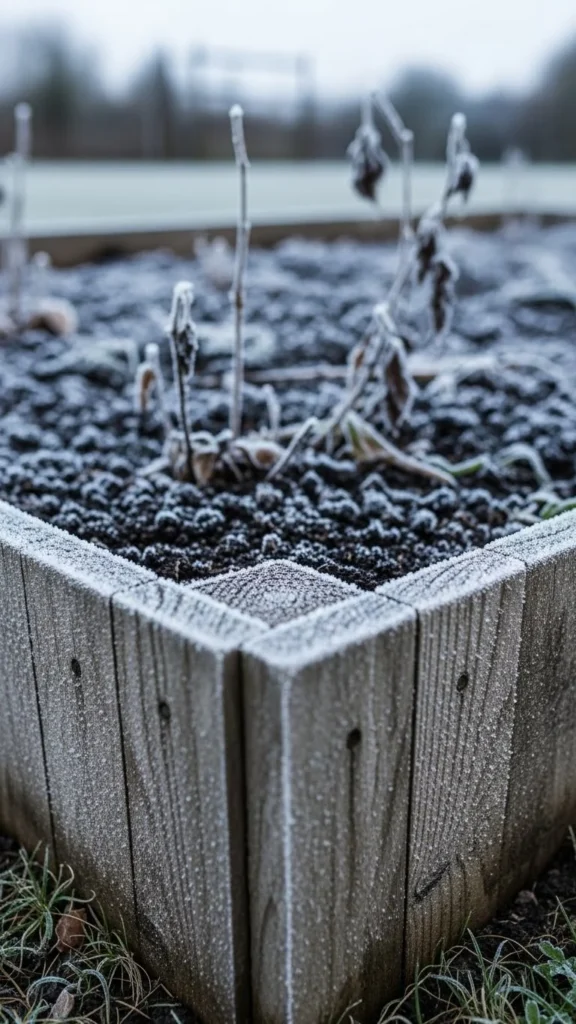
6. Timber Beam Borders
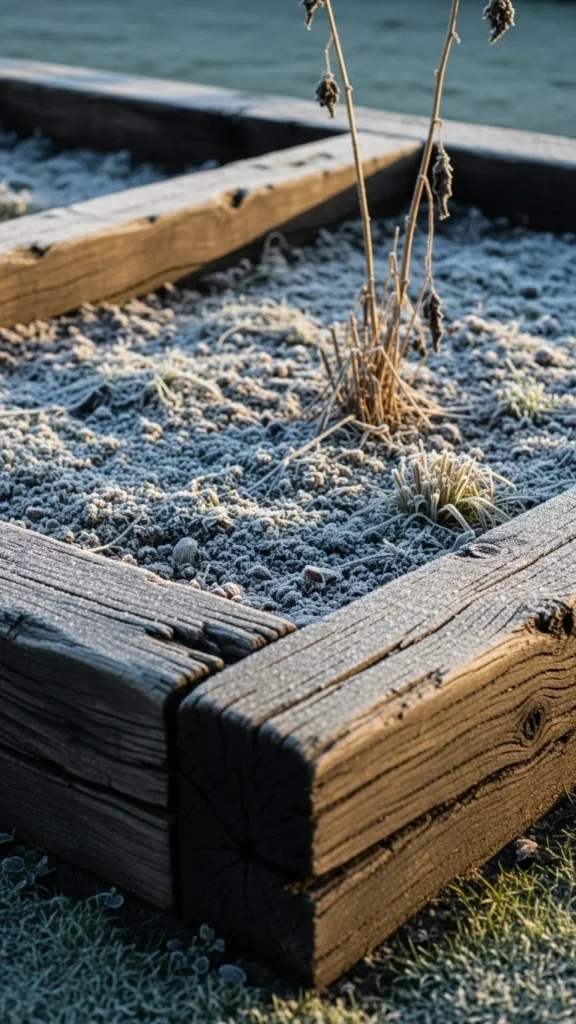
Thick timber beams give gardens warmth during cold months. They create clear borders while adding texture.
Use treated wood or rot-resistant types like cedar. Lay beams directly on compacted soil.
Timber fits rustic and farmhouse-style gardens. It also works well around vegetable beds resting for winter.
Budget tip: Reclaimed landscape timbers or old fence posts can be cut to size and reused.
7. Curved Metal Strip Edging

Metal strips bend easily, making them ideal for curved beds. The smooth lines soften winter landscapes while keeping order.
Install by pressing strips into soil along curves. Secure with stakes if needed.
This style suits modern and natural gardens alike.
Budget tip: Aluminum strips cost less than steel and still handle winter weather well.
8. Cobblestone Border Rows
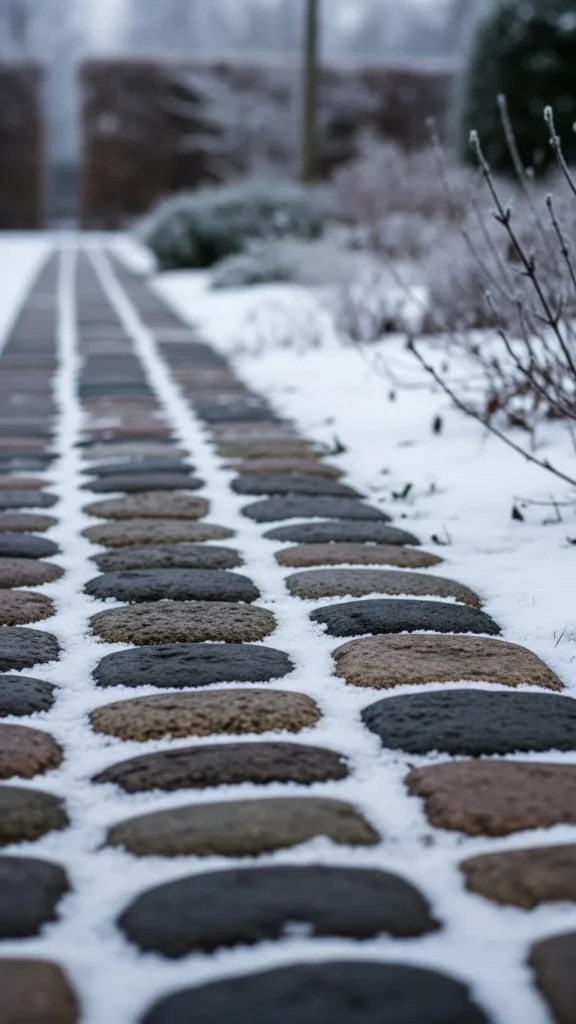
Cobblestones add texture and history. Their rounded shape contrasts nicely with straight paths.
Set stones tightly in sand or soil to prevent movement. Keep tops level for clean lines.
Cobblestone works well in traditional and cottage gardens.
Budget tip: Use smaller stones sold in bulk rather than decorative sets.
9. Raised Soil Berm Edging
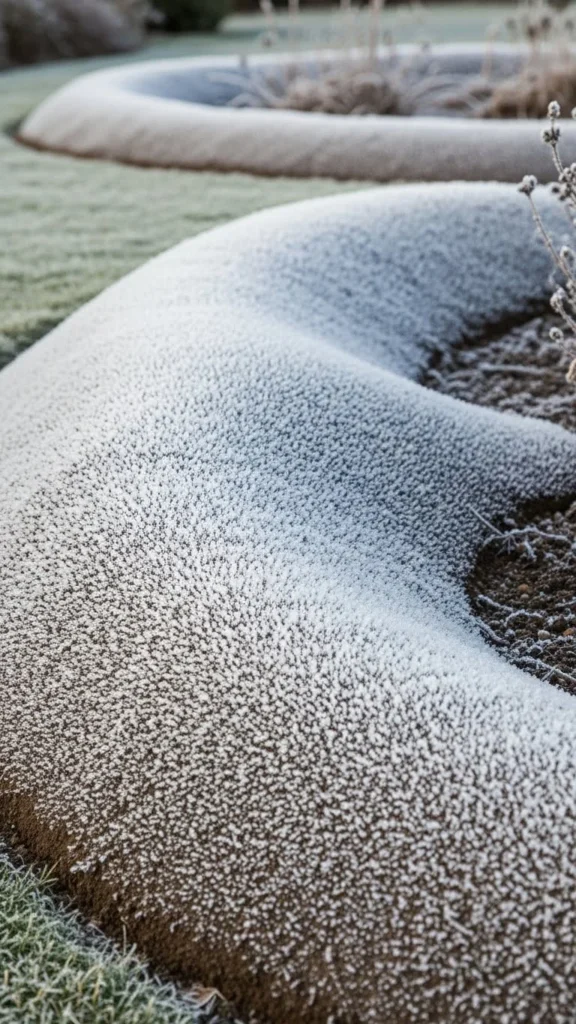
A raised soil berm shapes beds without added materials. Mound soil along borders and smooth edges by hand.
This method costs nothing and adapts easily. Berms stay visible even when plants fade.
They work best in informal gardens and larger spaces.
Budget tip: Use soil from nearby areas instead of buying new fill.
10. Stone Chip Borders
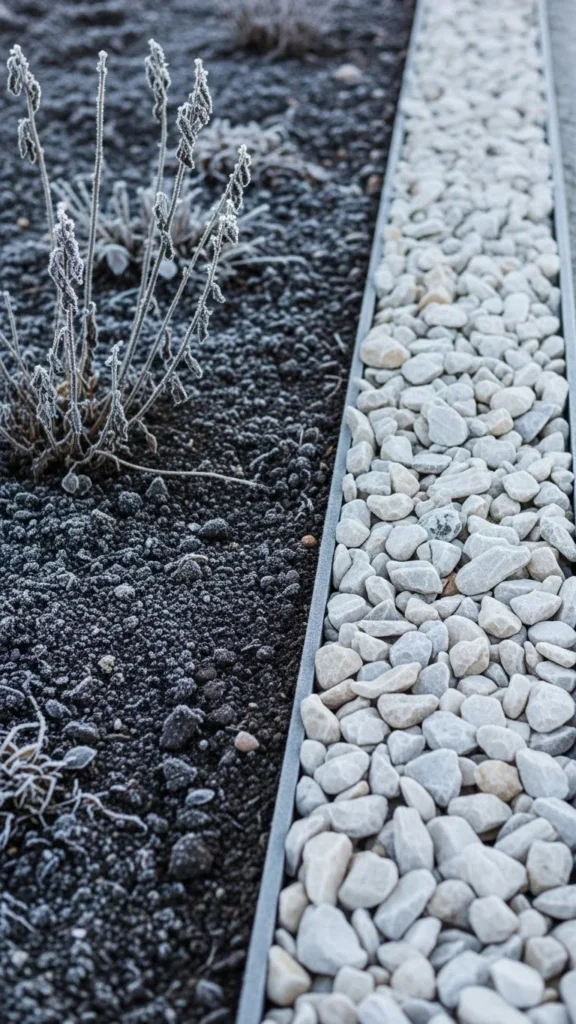
Stone chips create a neat line between beds and lawns. They drain well and reduce muddy edges.
Install with landscape fabric underneath to limit weeds.
This style suits modern and low-maintenance gardens.
Budget tip: Buy bulk bags rather than small decorative packs.
11. Recycled Concrete Rubble Edging
Broken concrete pieces create strong borders with an industrial look. Arrange pieces tightly for stability.
The rough texture adds interest during winter.
Budget tip: Use leftover concrete from past projects or local tear-downs.
12. Log Slice Borders
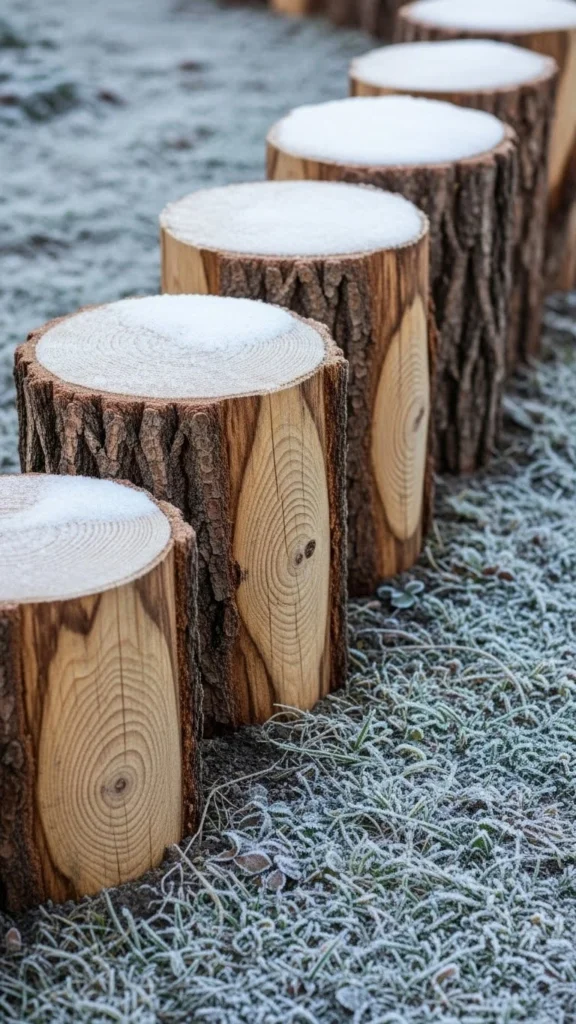
Log slices bring warmth and character. Place slices upright along borders.
Use rot-resistant wood and seal ends for longer life.
Budget tip: Cut fallen branches into slices instead of buying new wood.
13. Slate Tile Edging
Slate tiles add contrast and texture. Their dark color stands out against snow and soil.
Set tiles upright for stronger definition.
Budget tip: Use broken slate pieces arranged evenly.
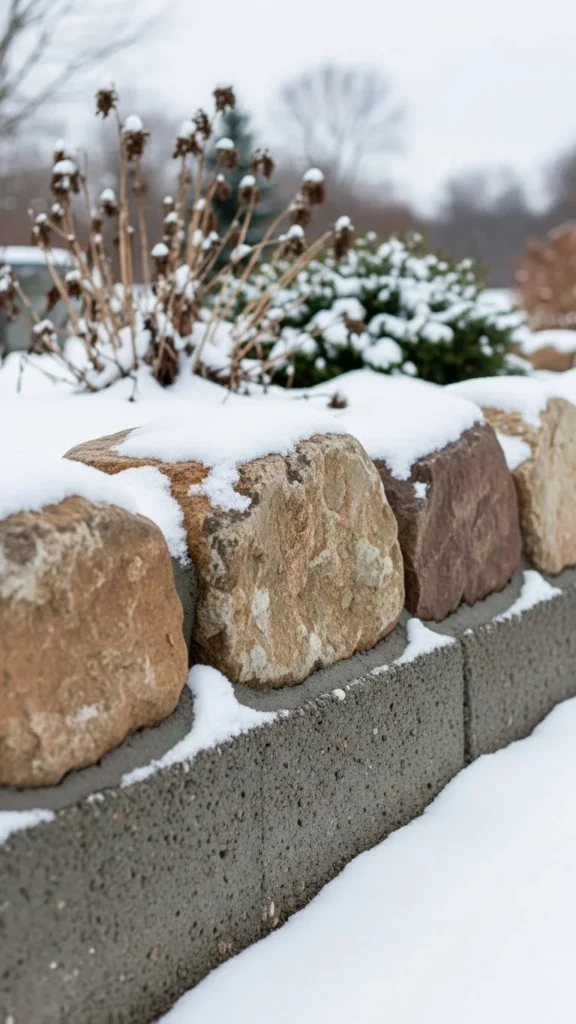
14. Low Retaining Block Edging
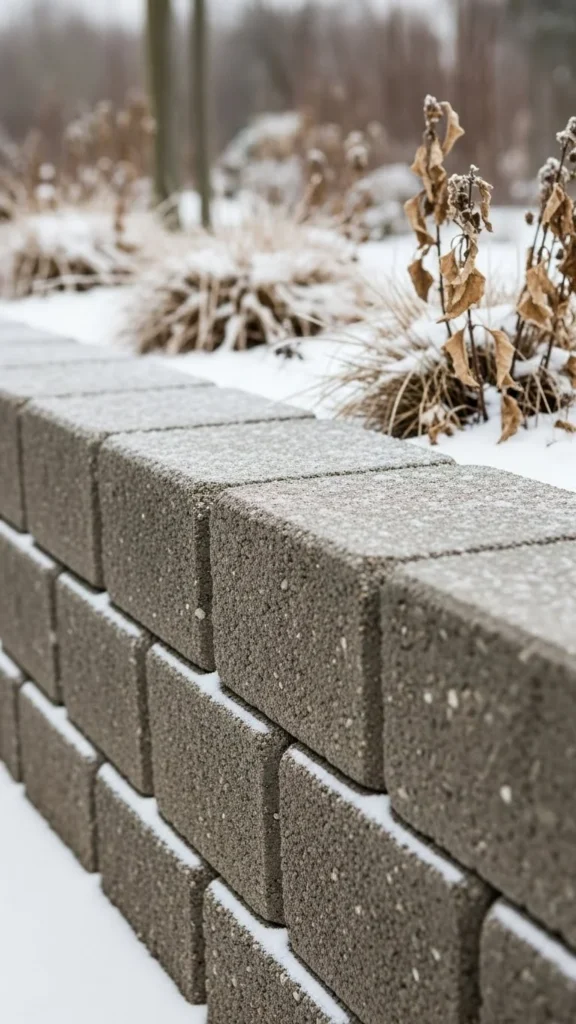
Small retaining blocks define edges while holding soil.
Stack blocks securely without mortar for flexibility.
Budget tip: Use single-row installations to save material.
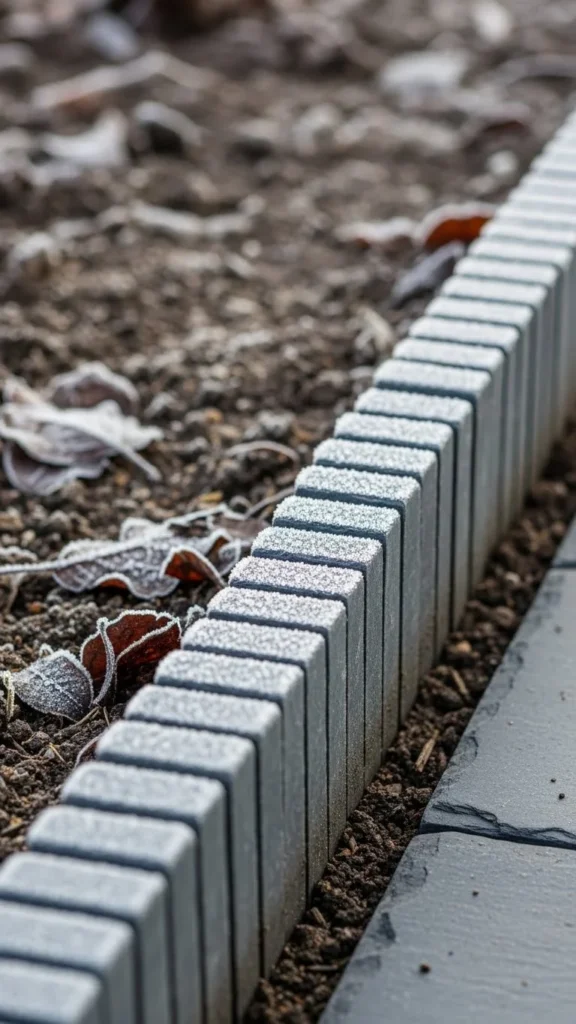
15. Brick Flat Lay Borders
Flat bricks create subtle borders that stay visible.
Lay bricks flush with soil for a clean finish.
Budget tip: Mix reclaimed bricks for character.
16. Stone Set-in-Concrete Edging
Setting stones in concrete locks edges in place.
Use this method along high-traffic areas.
Budget tip: Use small stones to reduce concrete use.
17. Rope-Style Concrete Edging
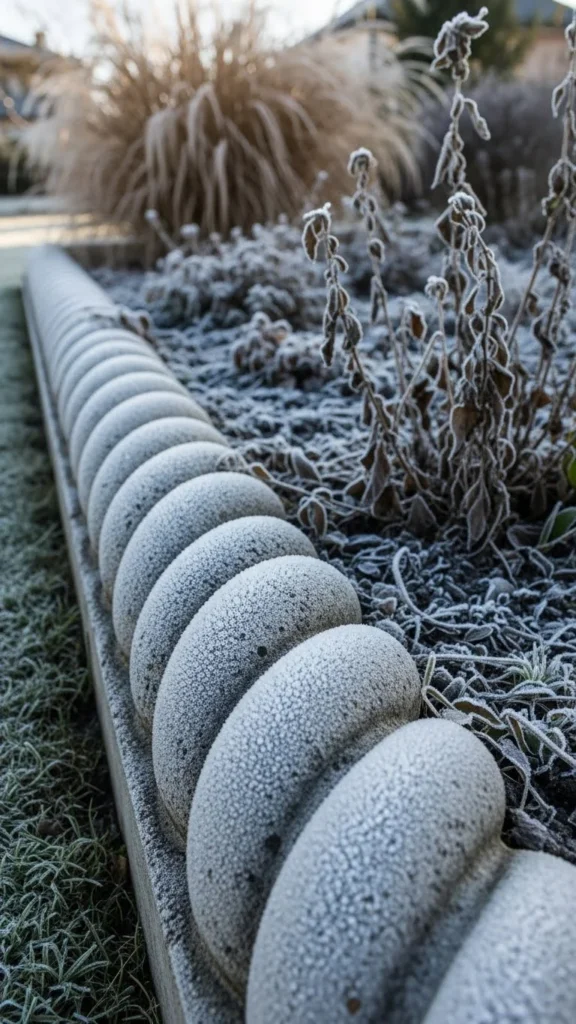
Rope edging adds detail without overpowering.
Install sections tightly together for continuity.
Budget tip: Choose neutral tones for wider use.
18. Metal Pipe Borders
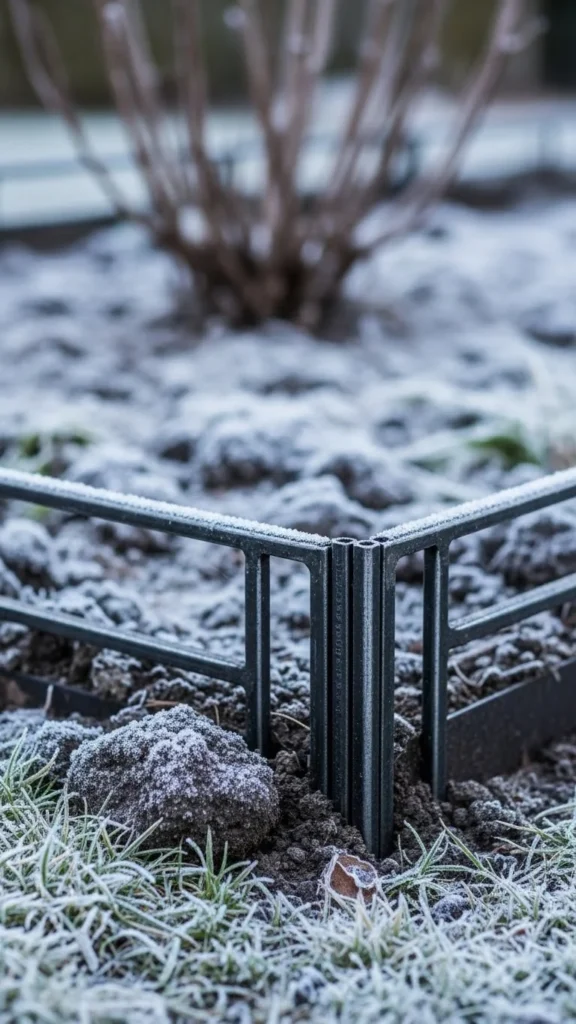
Metal pipes create simple linear edges.
Install horizontally at soil level.
Budget tip: Use surplus pipe lengths cut to size.
19. Bamboo Stake Edging
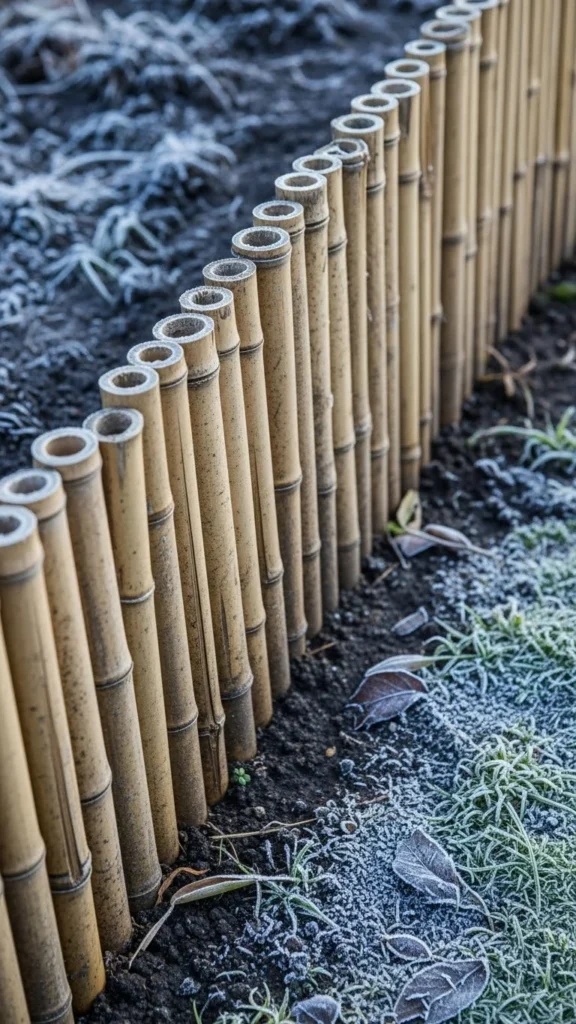
Bamboo adds texture and warmth.
Push stakes deep for stability.
Budget tip: Use garden-grade bamboo instead of decorative sets.
20. Stone and Gravel Combo Borders
Pair stones with gravel for layered interest.
Use stones to anchor gravel in place.
Budget tip: Use leftover materials from other projects.
21. Wood Plank Edging
Wood planks offer clean structure.
Install vertically or horizontally.
Budget tip: Use pressure-treated lumber offcuts.
22. Minimal Trench Cut Edging
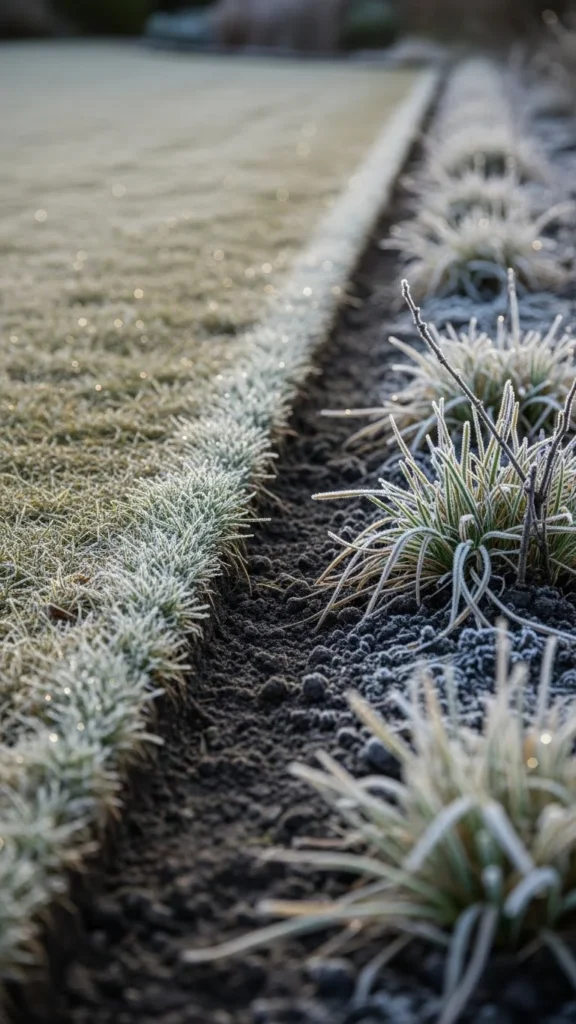
A sharp trench creates a crisp edge with no materials.
Use a spade to cut a clean line.
Maintain shape with occasional touch-ups.
Budget tip: This method costs nothing and works anywhere.
Conclusion
Winter garden edging shapes the entire landscape when plants rest. Clean borders give structure, guide the eye, and keep outdoor spaces looking intentional through cold months. Each idea here focuses on simple materials and hands-on methods that suit real budgets. Choose one style or mix a few where it makes sense. Small changes along bed edges can make the whole garden feel more put together, even in winter.

Leave a Reply