
There’s something magical about bringing a tiny, living landscape indoors during winter. When outdoor gardens slow down, a winter terrarium keeps greenery alive, adds warmth to your space, and becomes a calming décor piece you’ll love looking at every day. The best part? You don’t need fancy tools or expert skills—just a little creativity and a free afternoon.
Below is a simple, step-by-step guide to building a winter terrarium that feels cozy, stylish, and totally Pinterest-worthy.
Why a Winter Terrarium Works So Well
Winter terrariums thrive because indoor conditions are more stable than outdoor ones during cold months. They’re also:
- Low maintenance compared to full-size houseplants
- Perfect for small spaces like shelves, desks, or coffee tables
- A great way to add natural texture to winter décor
- Easy to customize for modern, rustic, or minimalist homes
Think of a terrarium as living décor—part plant project, part design moment.
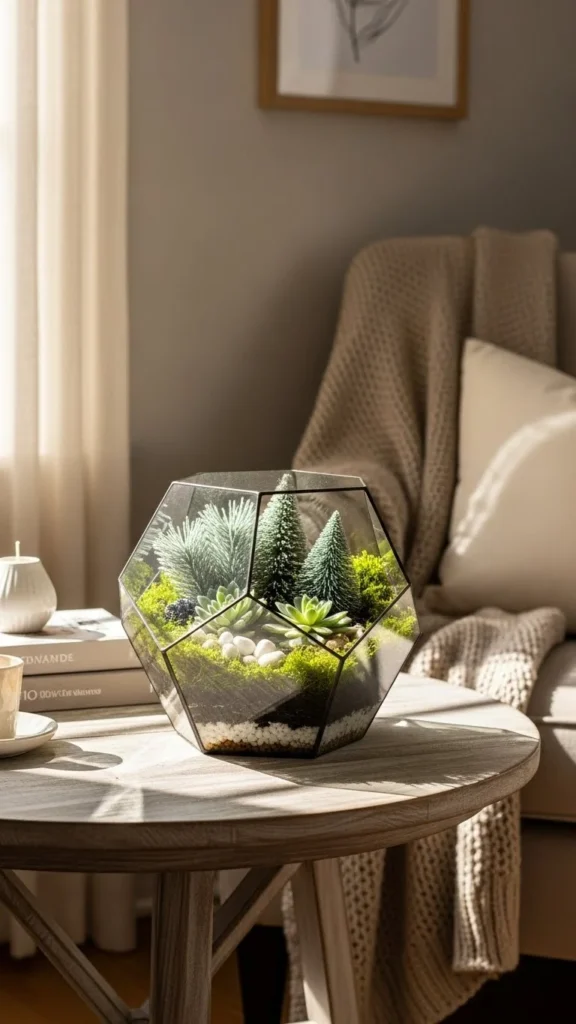
Choose the Right Container First
Your container sets the tone for the whole terrarium.
Popular options include:
- Clear glass bowls
- Apothecary jars
- Wide-mouth jars
- Small glass aquariums
Open containers are easier for beginners and better for winter plants that don’t love excess moisture.
Look for:
- Clear glass for maximum light
- A wide opening for easy planting
- A size that fits your space without overwhelming it

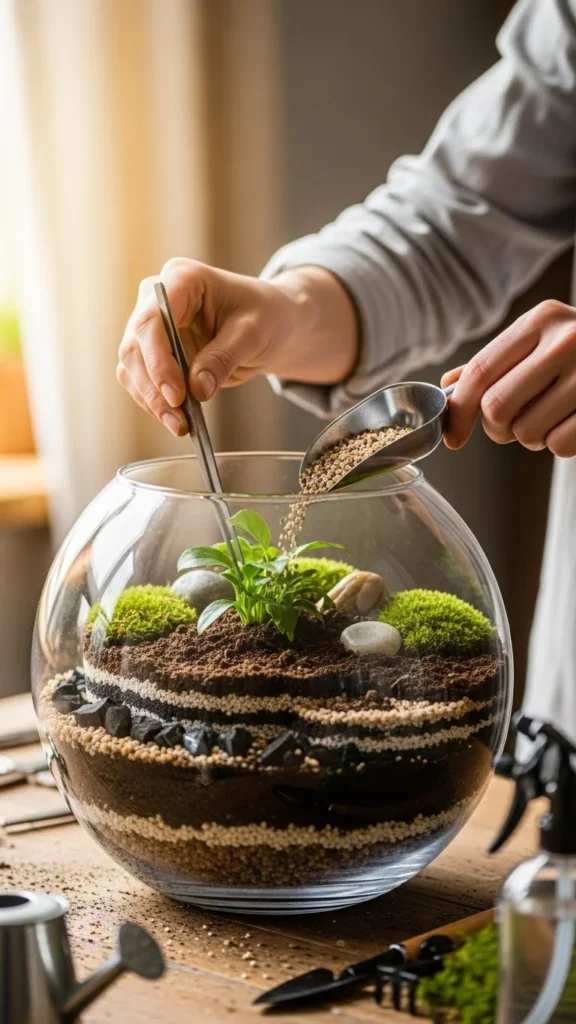
Gather Your Terrarium Materials
Before you start layering, gather everything in one place. This makes the process smoother and more fun.
You’ll need:
- Small stones or pebbles (for drainage)
- Activated charcoal (keeps things fresh)
- Potting soil suitable for indoor plants
- Moss (sheet or cushion moss works well)
- Small winter-friendly plants
- Optional décor like stones or mini figurines
A spoon or small scoop helps with neat layers, especially in narrow containers.
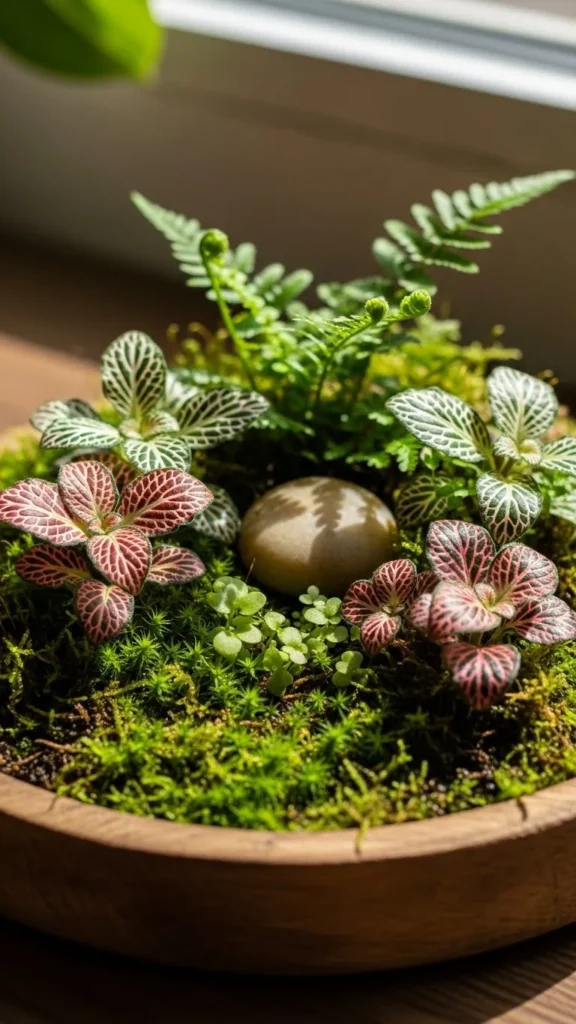
Pick Plants That Love Winter Conditions
The secret to a long-lasting winter terrarium is choosing the right plants.
Great winter terrarium plants:
- Moss varieties
- Mini ferns
- Fittonia (nerve plant)
- Pilea
- Small ivy cuttings
Look for plants that:
- Stay compact
- Prefer indirect light
- Tolerate steady indoor temperatures
Avoid fast-growing plants that will outgrow the container too quickly.
Layer Your Terrarium Step by Step
Now comes the fun part—building your tiny winter world.
Step 1: Drainage Layer
Add a thin layer of pebbles to the bottom. This prevents soggy roots.
Step 2: Charcoal Layer
Sprinkle activated charcoal over the stones. It helps absorb odors and excess moisture.
Step 3: Soil Layer
Add enough soil to support your plants’ roots. Keep it loose, not packed.
Step 4: Planting
Gently remove plants from their pots, loosen roots slightly, and place them where you want them.
Step 5: Moss & Finishing Touches
Tuck moss around plants and add small stones or natural accents for texture.
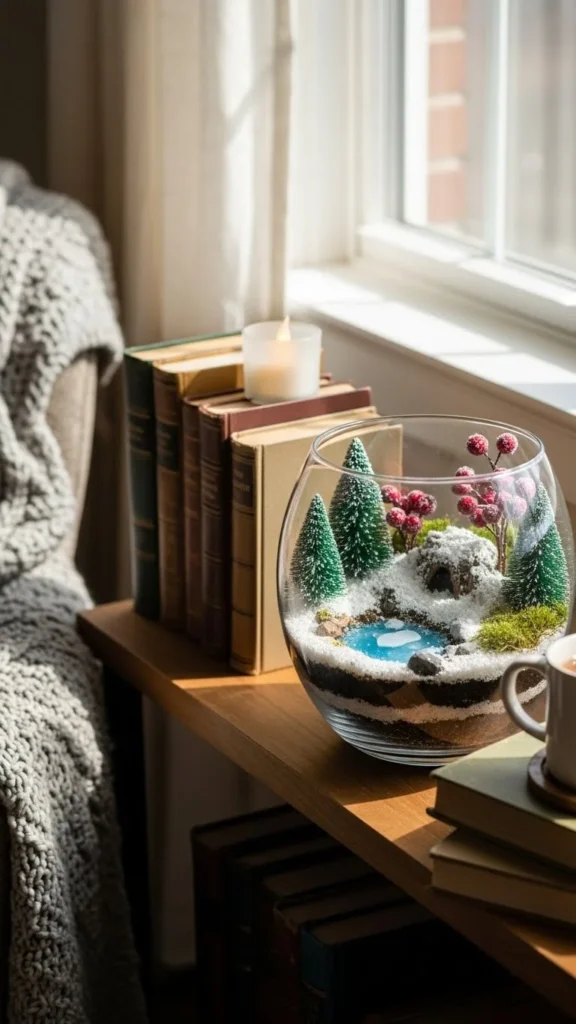
Style Your Terrarium for Cozy Winter Vibes
This is where your terrarium becomes décor, not just a plant container.
Styling ideas:
- Stick to neutral tones for a calm look
- Add natural stones for an earthy feel
- Keep décor minimal so plants stay the focus
- Use asymmetry for a modern, relaxed layout
Think “tiny winter forest” rather than crowded display.
Light and Placement Tips
Where you place your terrarium matters just as much as how you build it.
Best placement:
- Near a bright window with indirect light
- Away from cold drafts
- Not directly on heat sources
Rotate the terrarium every couple of weeks so all sides get light evenly.
Easy Care and Maintenance
Winter terrariums are forgiving, which makes them perfect for busy schedules.
Quick care tips:
- Water lightly—less is more
- Use a spray bottle for moss
- Wipe glass occasionally to keep it clear
- Trim plants if they start touching the glass
If you see condensation building up constantly, reduce watering or increase airflow.
Final Thoughts
A winter terrarium is one of the easiest ways to add life and warmth to your home during colder months. It’s calming to build, beautiful to display, and simple to care for—exactly the kind of cozy project winter calls for.
Save this idea for later, gather a few supplies, and create a little green escape you’ll enjoy all season long

Leave a Reply