
A well-designed garden pathway doesn’t just connect spaces—it tells a story. Whether it leads to a cozy seating nook or winds through vibrant flower beds, the right path can instantly elevate your garden’s charm. The best part? You don’t need expensive materials or professional tools to create one. With a little creativity and effort, you can craft stunning pathways using simple, affordable materials you may already have.

Step 1: Plan Your Pathway’s Shape and Purpose
Before you grab a shovel, take a few moments to plan. Think about how your garden is used and where a path would make the most sense. Do you want a straight, formal walkway leading to your patio, or a curved, whimsical trail that guides visitors through flower beds?
Here are a few quick planning tips:
- Observe natural routes: Notice where you already walk—those worn spots often reveal the best places for paths.
- Consider the style: Straight lines feel modern and structured, while curved paths add a relaxed, organic feel.
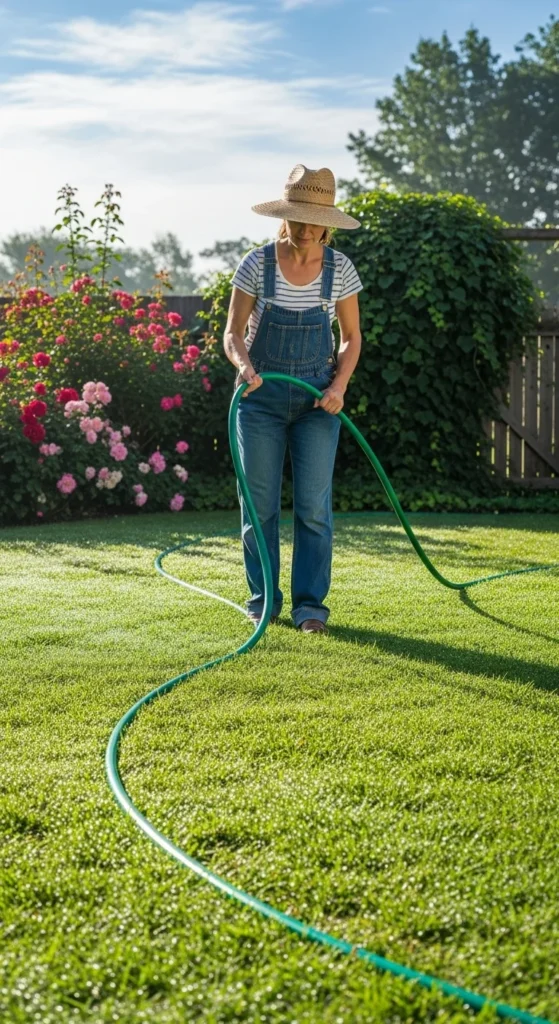
- Test with a garden hose or rope: Lay it down to visualize your future pathway before you start digging.
Step 2: Choose Simple, Affordable Materials
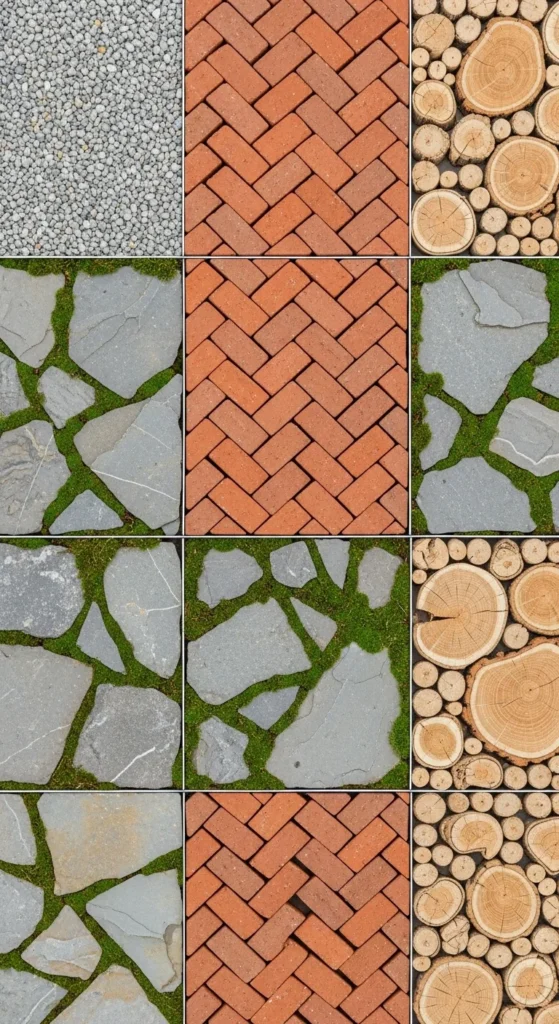
You can build beautiful pathways with materials that are easy to find and budget-friendly. Here are some popular options:
1. Gravel
- Low-cost and easy to install.
- Ideal for informal garden designs.
- Works best with a solid base layer of sand or crushed stone to prevent sinking.
2. Stepping Stones
- Perfect for natural-looking paths.
- Use flagstone, concrete slabs, or even upcycled broken tiles.
- Space them evenly for comfortable walking.
3. Wood Slices or Pallets
- Great for rustic gardens or woodland settings.
- Use treated wood or seal it to prevent rot.
- Combine with gravel or mulch for contrast.
4. Brick or Pavers
- Create a clean, classic look.
- Arrange in fun patterns like herringbone, basketweave, or straight lines.
- Best for high-traffic areas.
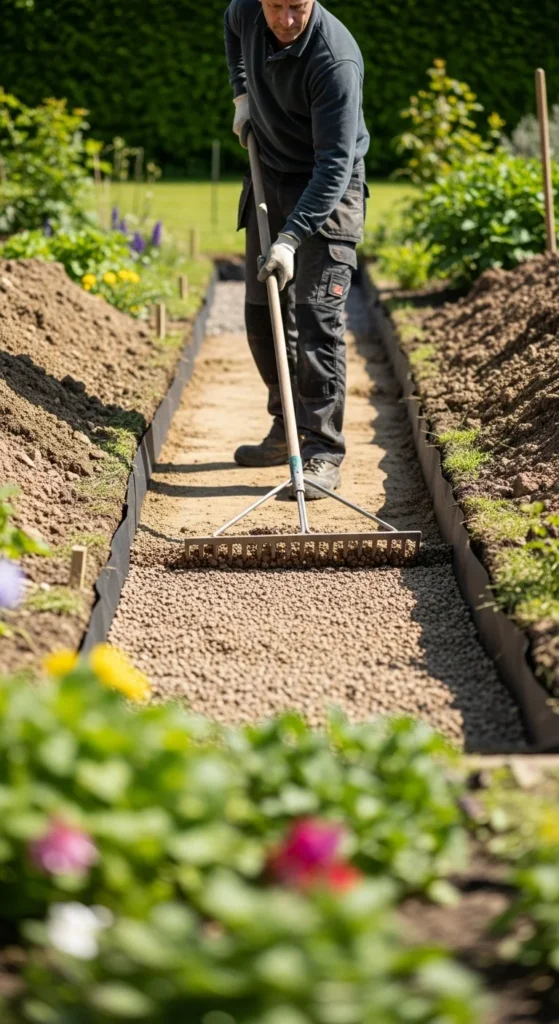
Step 3: Prepare the Ground
A little preparation goes a long way toward a long-lasting path.
- Mark your path: Use string, stakes, or spray paint to outline it.
- Dig to the right depth: Usually 2–4 inches deep, depending on your material.
- Add a weed barrier: A simple landscape fabric can save hours of maintenance later.
- Level and compact: Smooth the surface with a rake and tamp it down before adding your chosen material.
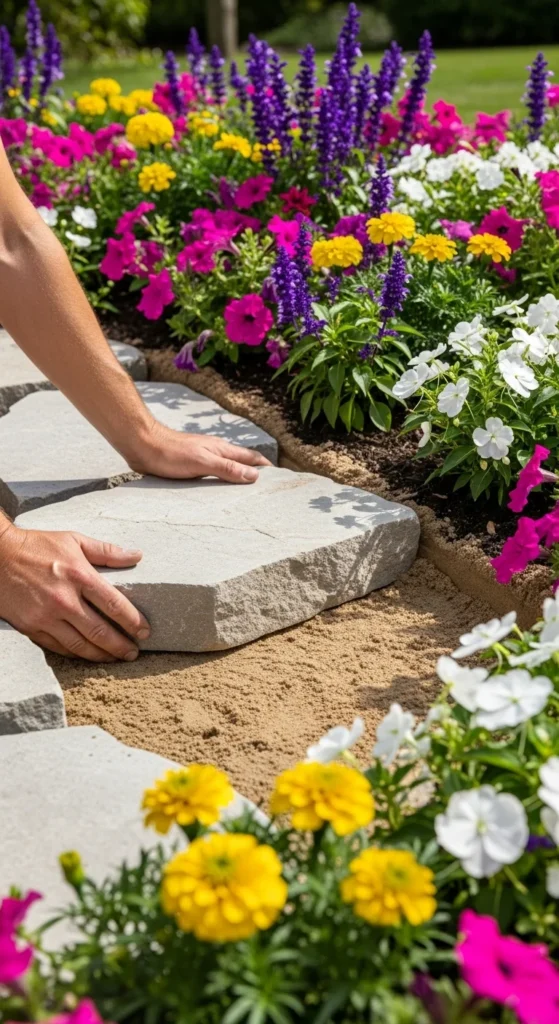
Step 4: Lay Down Your Materials
Now comes the fun part—bringing your pathway to life!
- For gravel paths: Pour gravel evenly, then level it out with a rake. Use edging stones or logs to keep the gravel in place.
- For stepping stones: Lay stones on sand or soil, adjusting each until it feels stable underfoot.
- For bricks or pavers: Start at one end, pressing each firmly into a bed of sand. Fill gaps with sand or fine gravel for a seamless look.
- For wood slices: Lay them like stepping stones and fill gaps with mulch or small pebbles.
Pro Tip: Test walk your path as you go. You’ll spot uneven areas before you finish!
Step 5: Add Finishing Touches
The details make all the difference. You can make your pathway pop with creative touches:
- Edging: Use plants, small stones, or metal strips to frame your path neatly.
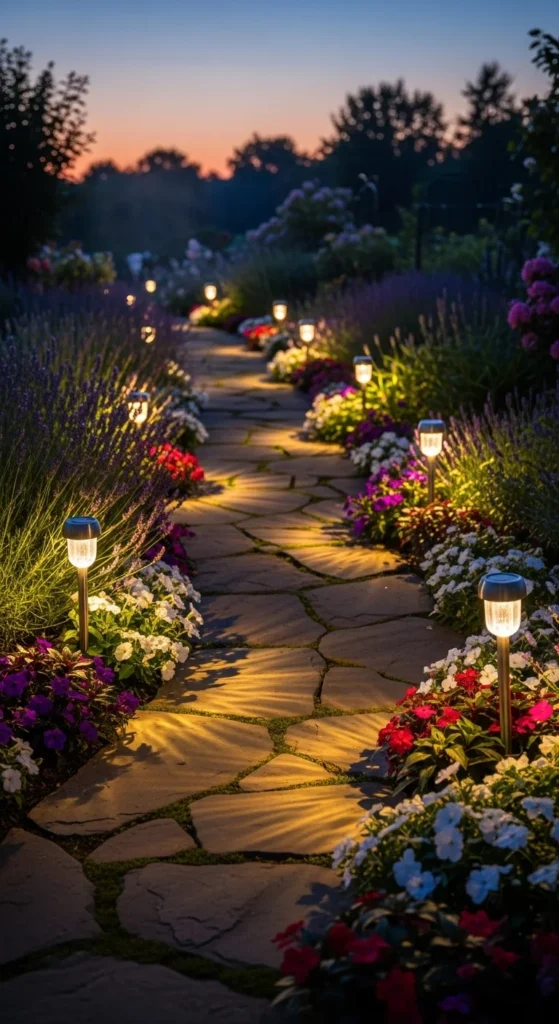
- Lighting: Solar lights or lanterns add both safety and evening charm.
- Plant accents: Add ground covers like thyme or moss between stones for a natural, lived-in feel.
- Maintenance: Sweep, refill gravel, or trim edges as needed to keep it fresh year-round.
Step 6: Enjoy Your New Pathway
Once your pathway is finished, step back and take it all in. You’ve transformed a simple garden space into a welcoming retreat. Every step you take on your new path will feel rewarding—especially knowing you built it yourself.
Quick Recap:
- Plan your pathway layout before digging.
- Choose materials that fit your budget and garden style.
- Prepare the ground for durability.
- Add lighting, edging, and plants for the finishing touch.
Your garden pathway isn’t just practical—it’s part of the story your outdoor space tells. Whether it’s rustic wood, smooth stone, or charming gravel, it reflects your personality and creativity.
Save this guide for later and start planning your dream pathway today!

Leave a Reply